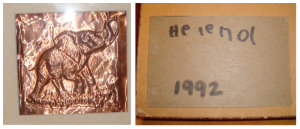
 My parents still have this framed at their house. When I was 6, I did a DIY foil project, and I didn’t even know it. I remember putting the thin copper foil over a stencil, and the teacher told us to rub every little nook until we could see the entire stencil. Fast forward 18 years later, and a little phenomenon called Pinterest brought my attention to this craft. I decided to take a stab at it because (1) how hard could it be?! and (2) the Pinterest example was an H, it must be fate. I’ve also apparently downgraded my crafting skills over the years, because I’m pretty certain the 1992 version looks cooler than my 2012 version. Regardless, it’s a neat technique, and if you’re a better glue-drawer than me, you could make something pretty cool! This would also be a neat project to do with kids. So read on…
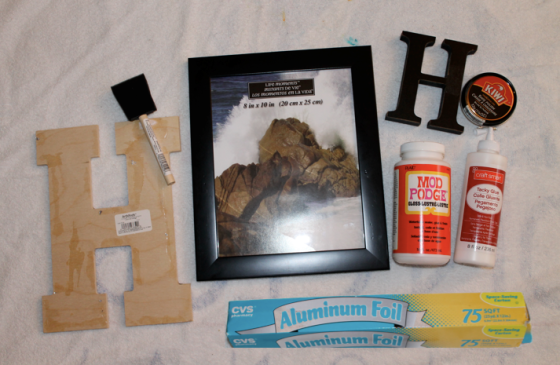
I did two projects at the same time. One was just a simple monogram letter, and the other was a letter in a frame. At the bare minimum, here’s what you’ll need:
- “Object” – What ever it is you’re going to apply your effect to.
- Tacky glue or puffy paint (Elmer’s glue will NOT work, it flattens out as it dries. The Tacky glue will hold it’s shape and dry raised.)
- Aluminum foil.
- Mod podge.
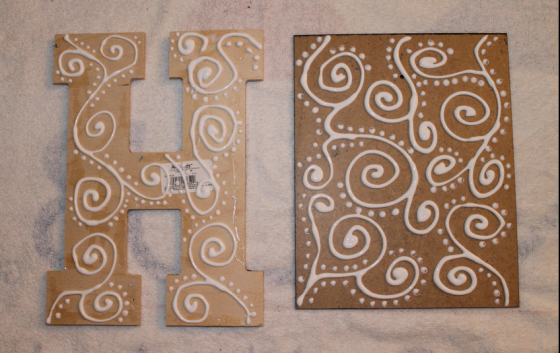
Start by drawing your design with tacky glue or puffy paint on your object. I’d recommend either practicing first, or at least drawing it with a pencil and tracing over it with glue. It tuned out that I wasn’t as good of a glue-drawer as I had hoped. Regardless, I crafted on… The one on the right below is simply the back of the picture frame.
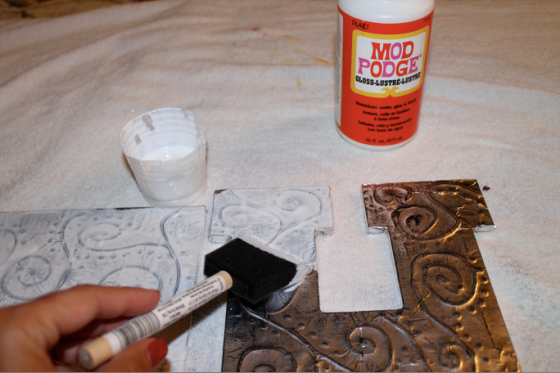
Let the glue dry overnight. Then, lay a piece of tin foil (shiny side down, dull side up) over the object and fold the corners over the edges to hold it in place. Use a cloth (don’t use your fingers, the foil rips easily and a nail could rip it) to rub at all of the nooks and crannies to display the design. Once all the design is showing, glue the excess tin foil down to the back of the object. For the letter, I cut the inside edges at an angle and then was able to wrap it almost like a present.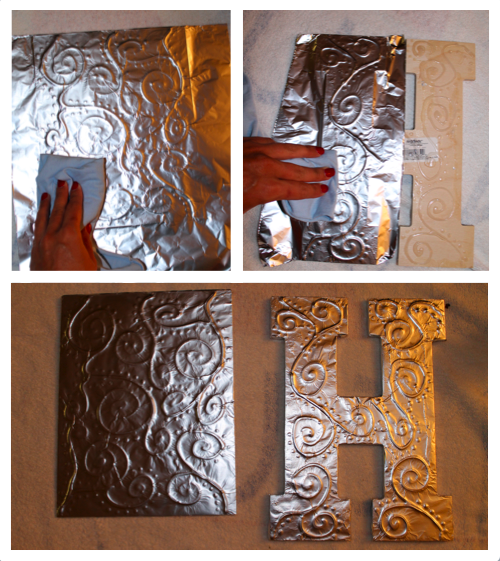 Next, use a cloth to rub shoe polish over your object. This will give it the antiqued look (it will look better after you mod podge it, I swear!). Don’t be afraid to put too much on, it wipes off easily if you think it’s too dark.
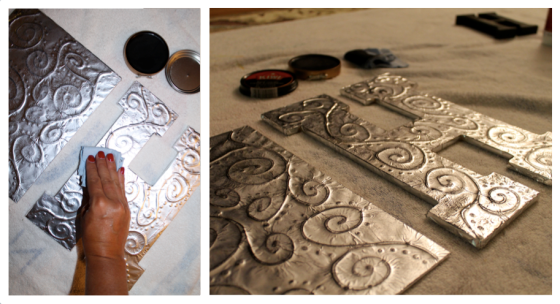 Lastly, paint a thick layer of mod podge over your project. This will take away the “tin-foil-y” look. Let it dry overnight.
Once it dried, my H was done!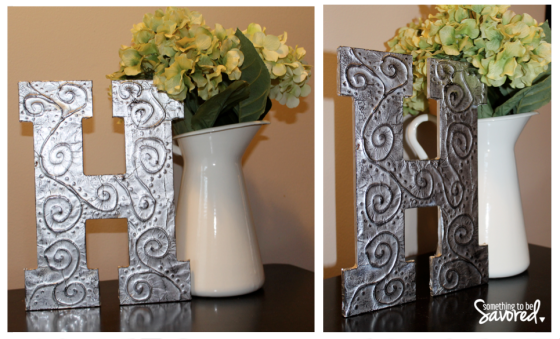
And all I had to do was hot glue the little black H I had found on clearance at Marshalls onto the picture frame (sans glass), and this project was complete, too!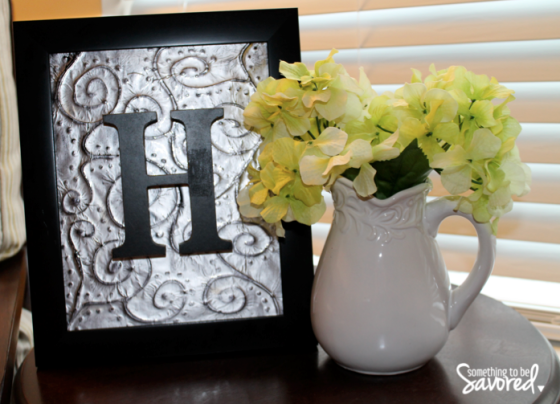


I think you just stole my heart with these! What an amazing idea!
Definitely give it a try! It looks like you’re all about adding some pizazz to your new house, and this would be a cute, simple, and pizzazz-a-licious way to do it! 🙂
My friend and I are doing letters as a project this weekend! We have made a couple modifications so far – first, we want to use these to hang on our front doors, so we doubled up the letters. We were able to find 1/4″ thick ones at Hobby Lobby, hot glued them together, and now we each have one letter that is1/2″ thick, which is much less flimsy. The second thing we have done differently is we didn’t freehand our designs. Neither of us is really artistic, so we Googled some patterns, and then transferred them to the wood using the wax paper method. After the patterns had been transferred, we went to town with the puffy paint. Currently, that’s all the further we have gotten because we are now letting it set overnight to dry. This has been fun so far though!
Exactly how do you transfer a design using wax paper? If you are talking about transfers then I still don’t know how to do it?
Does it make a difference if you use the gloss mod podge or the matte mod podge?
Hi Tashia — I don’t think it would make a difference! I used gloss and it doesn’t look very shiny, so matte would probably be just a bit flatter.
What color shoe Polish did you use?
Very cute idea!!! I’ll give this a try! Julia
What color shoe polish???
How cool!
Instead of making the background using your method. I bought three letters from Joanne fabric store. I bought the letter E & P Using your method I made up a design on each letter.
Used scrap booking paper as the background and I framed it. It was a big hit with the person I gave it to. I love this idea. It was a real fun project to do. I think it would make a real nice wedding present but for that i would put the wedding date ont it. Thaks for a great project.
Love this idea, a really pretty easy & fun idea! Love the idea of Googling or as I do Bing it for a great pattern. Black shoe polish will be great for an antique affect, Think smaller letters for a baby name plate for a nursery!
Super cool!! Love this whole idea…now I’m thinking the same idea with the texturizing tools using a cuttlebug tool….thanks for the inspiration!!
Catherine
I loved this and wanted to try it right away and did not have everything on hand so I used stiff cardboard and basic white glue, it worked I just had to let it dry and go over it twice. I also tried it with hot glue and that worked as well. It turned out great, thanks for the idea.
Pingback: The Great Art Wall Project – Part 3: Letters | Danielle's Art Projects
Does the shoe polish need to dry completely before applying mod podge?
I LOVE the elephant!! Do u remember what kind of stencil you used for it?!?! I am definitely going to make one of the letters!! My son brought a drawing he did like this home from school a few years ago and I have had it on my wall ever since.. He said it was super easy but I had no idea!!! Thank you so much for sharing!!
So cool!! Love love LOVE this! Thanks for sharing…can’t wait to try it!
I loved this project… Hope to do this!!! Thanks fie sharing..
That looks fantastic! I love it! Certainly will have to try that! Thanks for the inspiration!
I Iam living this I also did a project like this n grade school thanks for the memory
I have not seen this technique before. Thank you for sharing!! You didn’t glue the foil onto the letter? Just wanted to make sure I was not missing a step!
I would use a thin line of low,-heat hot glue gun not a slow drying glue you can smudge easily. As far as shoe polish is concerned, you don’t need it. Just thin black acrylic paint with water, you need a tiny amount, and wipe on with a paper towel or brush, let it sit for a bit a wipe off gently with a dry towel or paper towel. Most of it will stick in the right places.